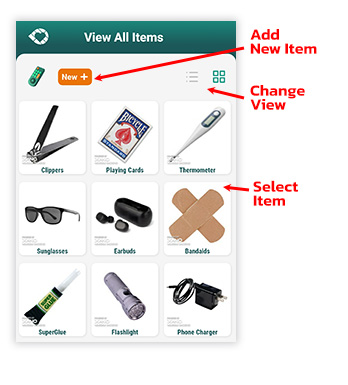
Snappy Elements Overview

There are four key elements of SnappyTracker. 

From the home page you can see the Items, Rooms, and Categories.

The fourth is a Spot which is covered a little later. 

Each category and room will have an indicator of the number of items that are within that element.

screenshot homepage

SnappyTracker Items

Items

We’ve added ten items for you to get you started.
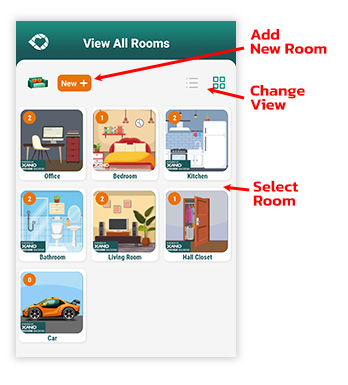
screenshot Items

SnappyTracker Rooms

Rooms

Items are located inside “Rooms.” We’ve started you out with seven rooms.
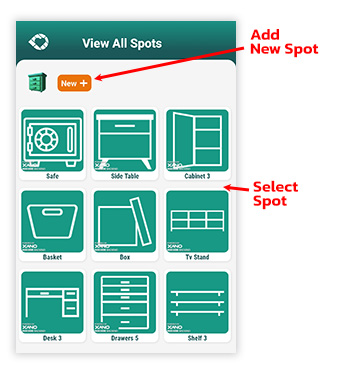
screenshot Rooms

SnappyTracker Spots

Spots

Optionally, you can assign “Spots” to items. We’ve started you with nine spots. Spots are usually types of furniture or containers.
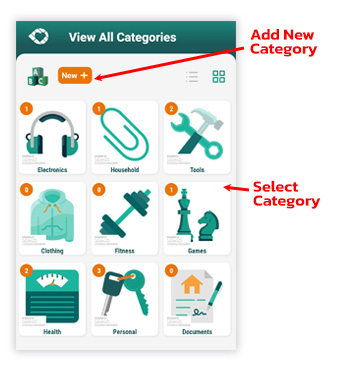
screenshot Spots

SnappyTracker Categories

Categories

Additionally, you can add “Categories” to group items. We’ve started you out with nine categories.
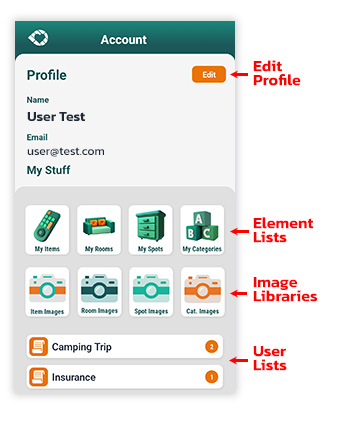
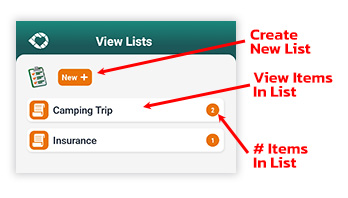
screenshot Categories

Image Libraries

For every type of element, there is an image library that you can use for your elements.
To start adding new elements, the fastest way is to first add images for all of your elements so that you can assign them to your elements when you’re adding them.

A shortcut to see your elements and image libraries is available in your user profile.

Screenshot User Profile

Choosing Images

To add new images you can either upload your own or download any of several hundred images in the SnappyTracker image finder.

Uploading Images

From the a Add Photo page you can upload images from your phone, or take images directly from your camera. 

For the best output, set your phone’s camera ratio to square.

Screenshot Take Photo

Image Finder

Browse and filter hundreds of photos on the SnappyTracker Image finder to upload to your Elements. 

New images are added all the time.  

Reccomend a new element image.

Screenshot Take Photo

Adding New Elements

Elements can be added through the “Add New” button or from within an element list

Although you can add elements in any order at any time, when you’re first getting started we’ve found this to be the best order to add things.

  1. Rooms
  2. Containers
  3. Categories
  4. Items


Moving Items

Once you have an item and assigned it to a room, you can  move that item to another room with a couple of clicks.

  1. View your item
  2. Tap the element to change e.g. Room.
  3. From the pop-up, tap the new room.
 
That’s it!

Using Lists

SnappyTracker ListsAdditionally, you can create and assign items to “Lists.” 

Lists are typically groups of items that don’t belong to a particular category for things as;

  • borrowed items
  • things for a trip
  • for insurance
  • need to replace
  • team equipment
  • project
screenshot lists